Ryver is a newer form of communication, though it’s looking to be a pretty stable and decent one. Much like Slack, Hipchat, and others, it’s kind of IRC centered.
Ryver currently uses ‘basic’ authentication for their API. You will want to sign up a new account for your chat room specifically for use with their bots.
Place those login credentials in the email / password fields.
As soon as they have a stable oauth integration, we will be switching to this.
It should be noted that WHMCS Notify Extended stores all sensitive form encrypted (this includes emails and passwords)
Rather than use ‘open forums’, you will need to create a private team for related messages. You can then invite staff to these teams as appropriate
You can obtain the team ID by launching your river install in your browser, then clicking on the team ID.
The URL will contain the team id. It will look something like https://test.ryver.com/index.html#teams/1544763
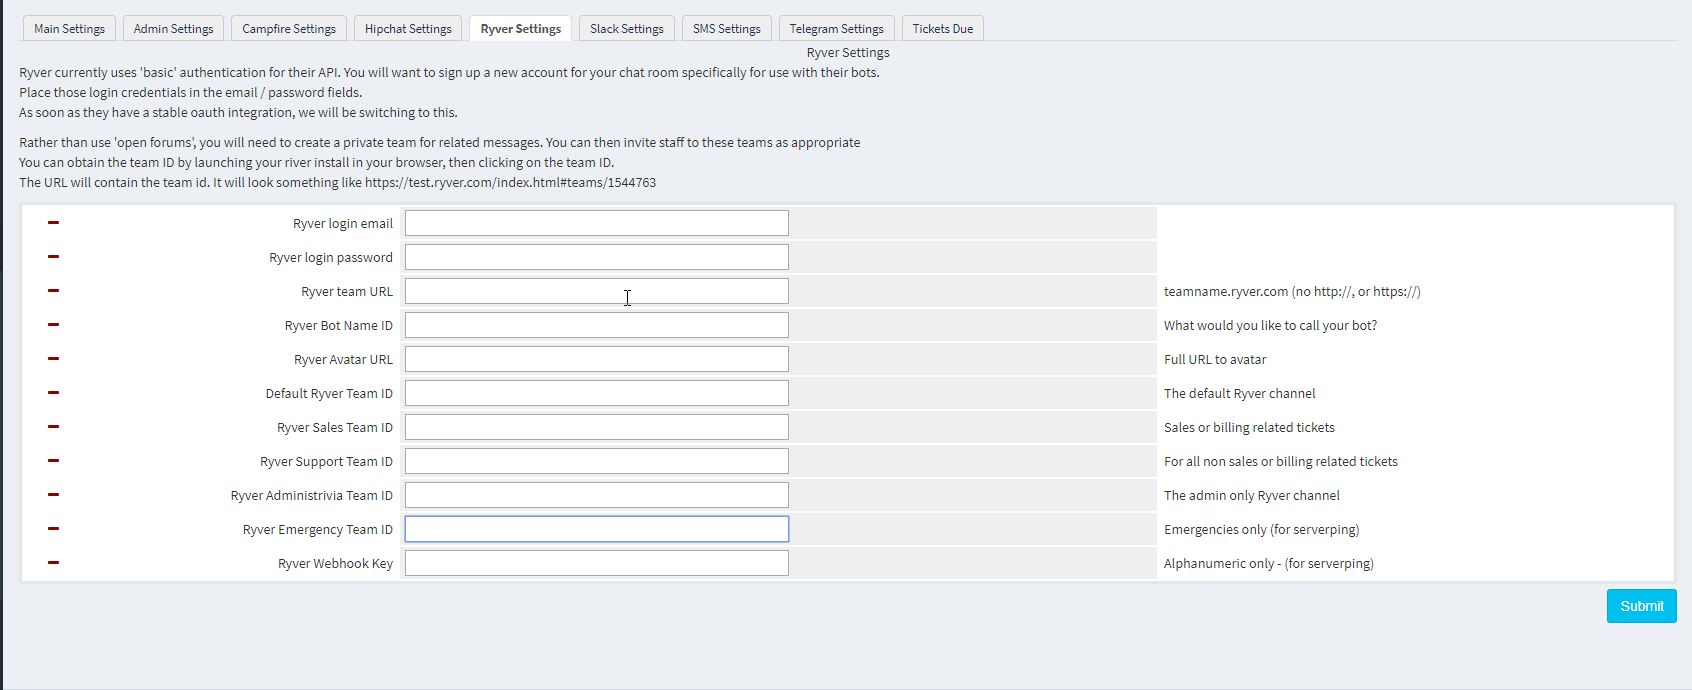
Here’s the configuration values for Ryver, and a brief explanation of them
- Ryver Login Email / Password
This is the email address / password you specifically created for Ryver. Again, you should have created a separate account, and used a pretty complex password - Ryver Team URL
This is your ryver team URL… Something like myteam.ryver.com (note: no http:// or https://) - Ryver Bot Name ID
You can name your bot whatever you like. Go ahead, try it! - Ryver Avatar URL
Make your bot totally unique and give it it’s own Avatar. Go on, I dare ya! - Ryver Sales/Support?Administrivia/Emergency/Default Team ID
Much like the rooms in other chats, not much to go on here.
You can obtain the team ID by launching your river install in your browser, then clicking on the team ID. - Ryver Webhook Key
Again, nothing much to see here (yet), but when there is, we’ll update this section
How do I obtain my Ryver ID
Ryver handles usernames the same way that it handles rooms and teams, by ID (ie: number). So, in order to obtain your Ryver ID for admin configuration, you’ll need to follow the follwing steps.
- Send a direct message to another admin
- Have them reply
- In the app (or your browser) , click on your username, then ‘go to user’. Make sure the right pane is showing
- In the right pane, at the bottom, you’ll see an ID field. That is your User ID